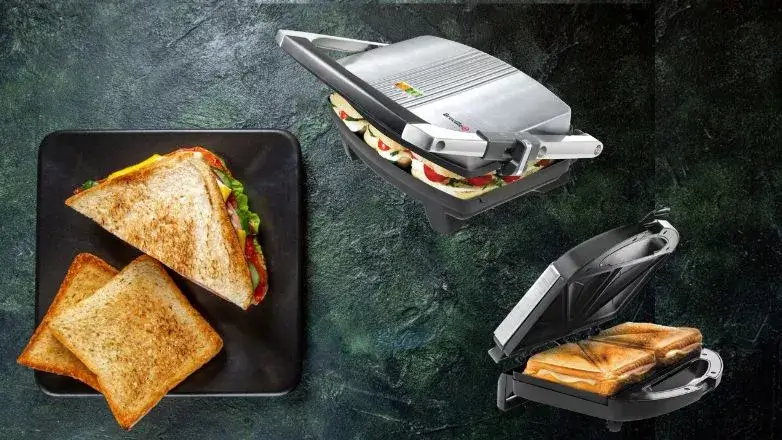
A Sandwich Maker can be a treasure for people who want simple yet tasty food in a hurry. When I have a rush hour before work or a very lazy afternoon and don’t have the energy to make a very fancy meal, a simple tasty sandwich can be your Best hunger breaker.
But what is the best option if a simple sandwich isn’t enough to satisfy your hunger? Then a sandwich maker is your best friend. It can transform a simple, unremarkable toast into a warm, delectable, eye-catching, oozy sandwich in a matter of minutes using ordinary bread and ingredients.
You can also add fancy cheese, bread, additional spreads, fillings, and other ingredients to make it even more delicious. A sand wich maker is simple to use and convenient; even children can operate it with ease. Let’s take a look at How to use a Sandwich Maker.
Table of Contents
How to use a Sandwich Maker? – Quick Overview
There are two types of sandwich makers available on the market today. They are the less expensive common type, and the other is the more expensive Panini press sandwich maker. Lower and upper plates are included in the low-cost and widely available model. The inside wall has been molded into square shapes to accommodate the regular size of the bread. After grilling, the sandwiches are sealed into their classic triangular shapes by sandwich makers who press the bread.
The Panini press grill sandwich maker, on the other hand, has extraordinary ridged plates. It occasionally has an extra weighted top plate attached to it. The plate eventually presses and grills the sandwiches perfectly. Both types of sandwich makers operate in a manner that is similar to one another. Anyone can use the tool with ease and make tasty sandwiches in a matter of minutes.
How to use a Toasted Sandwich Maker? Step by Step Instructions

When I purchased a sandwich maker, whether it is a low-cost common model or a high-priced Panini press grill model, I received a user manual with the product. Before using a sandwich maker, we must carefully read all of the instructions. There are many different types of sandwich makers available on the market from various companies.
Though the basic process of making sandwiches with the tools is similar, there are always minor differences between each product, so it is always a good idea to thoroughly read the user manual before using any kind of electronic device. When using a sandwich maker, you can also refer to the following steps.
Plug in the Sandwich Maker
First, turn on the sandwich maker. Always remember not to use extension cords to plug in the device before plugging it in. Keep it closed while it heats up and reaches a certain temperature. It may take a few moments to get ready. Nowadays, the majority of sandwich makers on the market include an indicator light that indicates when the machine is sufficiently heated and ready to use.
Prepare the Sandwiches
The basic sandwiches must be prepared with bread and other ingredients before use. Sandwiches should be made with the proper bread. Regular-sized bread is ideal for common sandwich makers; however, you can use any type of bread in Panini press makers. To make your sandwiches tastier, add extra toppings and fillings, as well as additional spreads. For the best results when making a grill cheese sandwich, use high-quality melting cheese. Apply a generous amount of butter to the outsides of the sandwiches.
Grease the Sandwich Maker
It is always advised to spread butter on the outsides of sandwiches to make them tastier and crisper from the outside. However, if you do not want to use butter in your sandwiches, you have another option. To grease your sandwich maker, spray a small amount of oil on the lower and upper plates of your tool; this will add flavor and texture. However, if you want your sandwiches to be completely oil-free, you can place them as is because most sandwich makers have completely nonstick plates. As a result, even if you put dry sandwich bread into it, it will not stick.
Place the Sandwiches
When you’re finished, carefully place the sandwiches on the bottom plate. Place it with extreme caution because the plates are extremely hot and you do not want to burn your hand. When assembling the sandwiches, keep in mind that the bread should fit completely into the molds; otherwise, the sandwiches will not be properly grilled.
Close the Sandwich Maker
After placing the sandwiches in the maker’s molds, the next step is to completely close them. If your sandwich maker has a clamp, make sure it is properly closed. You’ll have to wait a few minutes now. The indicator lights up when the sandwiches are ready to be removed. Only then can you open the sandwich maker.
Remove your Sandwiches
You can remove your sandwiches and place them on plates once the indicator lights up. Remember to use a wooden or silicone spatula to remove your sandwich because the plates are too hot to touch and can burn you if you touch them by any chance.
Unplug the Sandwich-Maker
After you’ve finished making all of your sandwiches, leave the maker open. Do not close it immediately and allow it to cool properly. Wipe the plates down with a damp cloth or a sponge. After that, you can store it.
Conclusion
These are the basic instructions for How to use a Sandwich Maker that you can use if you have one. Every sandwich maker has the same characteristics. So the instructions above can help you handle any type of sandwich maker very easily so that you can treat yourself to warm, oozy, and delicious sandwiches whenever you want in just a few minutes.
Read Also: Ceramic vs Stainless Steel Kitchen Knives


