You are running late for the presentation or the exam, you start your car just to find out that the battery is dead. Well, that’s a serious predicament to get yourself in, anyhow you wonder what could be the reason? There could be many reasons, you might have not used the car frequently or you left the headlights on. Be that as it may, you will need some tricks up your sleeves to prevent any further inconveniences in the foreseeable future, that is why we have How to Charge Car Battery With Home Inverter.
And guess what? We have the escape plan.
Getting Started on How to Charge Car Battery With Home Inverter
So, before going into charging your battery with the inverter, let’s step up some things first. There are some things you need to do before charging your battery. These things are mentioned as follows:
Safety Gear
Safety is and should always be the number one priority before anything in life. So put on some safety gear before you are working on your vehicle. You can start by using protective eyeglasses, that will protect you from any spark or fluid or even dust. Additionally, ensure that the area in which you are working is sufficiently ventilated and visible so that you can see your hands going.
Wear some gloves for more safety. Gloves will help you prevent any cuts pinches or bruises to your hands and fingers when you are removing the battery or working in compact areas.
Another thing is to make sure that there are no children near the battery or the area you are working in. When you are connecting the battery with an inverter, the positive and negative cables can generate some spark.
These tips are not necessary, but hey, it’s in every case better to be on a more secure side.
Type of Battery
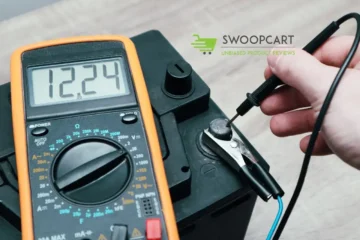
The next thing is to determine the type of battery you have in your car. Generally, you will find this detail written somewhere on the battery in the form of a label. Just in case the label is worn out or the details are hard to read, you can visit the manufacturer’s website for more details. In addition to this, also find out the voltage of your battery which you will find in the owner’s manual or on the label.
The type of battery may be serviceable which means you can do some things to improve the health of your battery and lifespan. These batteries are generally wet cells.
The other is non-serviceable sealed batteries, which are also known as Valve Regulated Lead Acid batteries or abbreviated to VRLA. However, they are not so common unless you’ve purchased it externally.
Removing the Battery
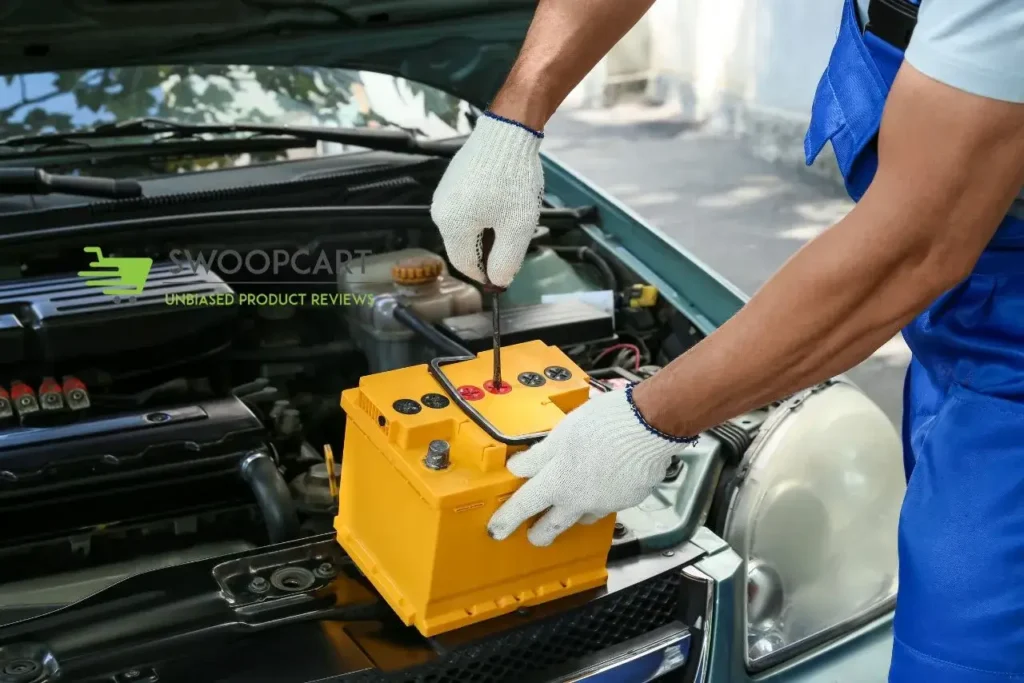
Safely remove the battery before you perform any repairs or some DIY stuff. While removing make sure to remember the screws and the parts that you removed with the battery and store them at someplace. Also, start by disconnecting the negative terminal and then after the positive terminal of the battery. Once the battery is removed take it to the inverter where you are going to charge it.
Terminals
Lastly, clean the terminals of the car battery to ensure a strong connection while charging. Sometimes the charging is strong, however, the dust and rust on the terminal might prevent or cause some troubles. For cleaning, you can use some wet cloth and baking soda or sandpaper pad for wiping.
With that being said, don’t touch the terminal with bare hands especially if there is some white powder on it. This white powder is usually sulphuric acid in dry form which can cause burns on your skin.
Charging the Battery

Now, let’s charge your battery. With the help of your home inverter, you can quickly charge the battery, and this method is way faster than any other alternative. Given that most of the home batteries for inverters are 12V, you can get some quick charging. You should not use this method always, but once in a while will work wonders for you.
So let’s get into it, shall we?
Setting the Connection
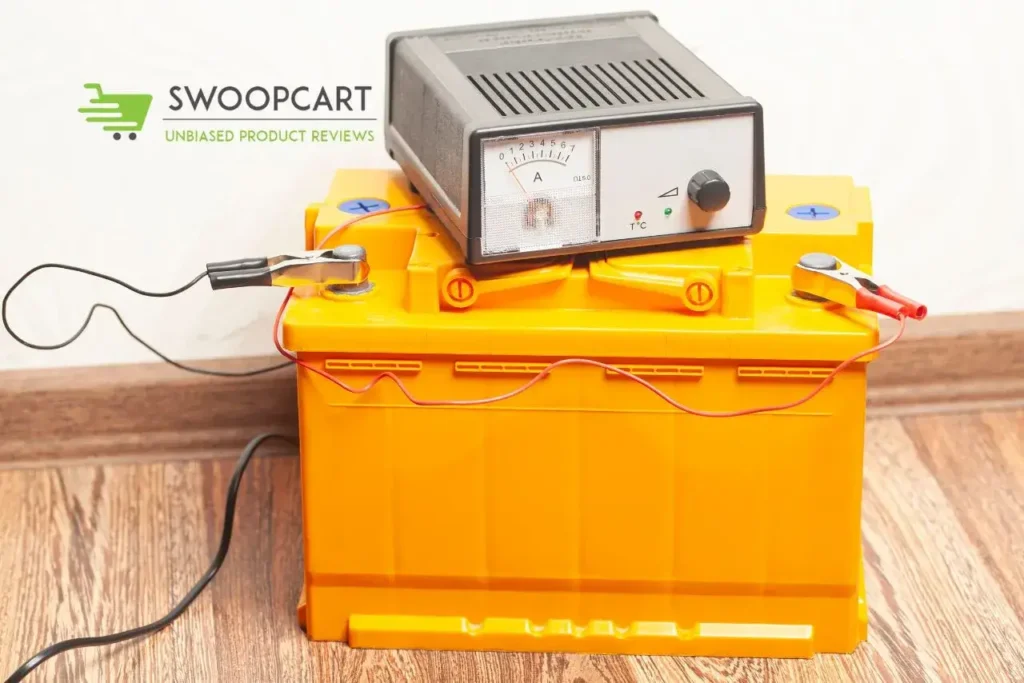
The connection setup is just like the one with a car charger. Make sure that the inverter is not connected to the power supply till you are done with the connections. You will find some wires behind the inverter, one of them will be Red and the other will be Black.
You must get acclimatized to the differences so that you can connect them to their appropriate connections. If you do it the other way around then you can get into trouble. The red cable signifies the positive connection and the Black one for the negative connection.
You will find the same on the battery terminal, there will be signs mentioned for positive (+) and negative (-). All you have to do is connect the positive cable, which in this case is red to the respective terminal and for the negative terminal, the black one should be connected.
While doing so you will see that both cables of the inverter have short ends that may not stay fixed on the battery terminals. That’s where Jumper Cable comes into play, get these cables before you start the connection and they will come in handy always.
Jumper cables have two clips at both ends and come in a pair of different colors. For the sake of understanding, we would recommend getting red and black color pairs, where the red is for the positive cable and the black is for the negative.
Clip the red cable of the inverter on the positive terminal of the battery. Similarly, clip the black cable to the negative terminal of the car battery.
Supplying the Power
Once you are done with the connection, cross-check that every wire is where it is supposed to be. Then after you plug the inverter into the outlet and start the power supply, while you do so, you will some sparking around the terminal which is completely normal.
The sparking indicates that the battery has some charging in it and is not completely dead. In case it doesn’t spark then it is also normal, meaning the battery is dead. However, please be extra sure with the connection process as if the connections are done in a wrong manner, it may explode the battery.
And that’s the last thing you would want right?
Voila
Here you go, after somewhat half an hour or one hour depending on your battery, the charging will be complete. Generally, for older batteries, it may take up to 2-3 hours and for newer batteries, the charging may complete within one or half-hour.
Some Other Alternatives
Besides, charging the car battery with the help of a home inverter, there are some other ways also you can try. It’s imperative to get used to other tips and tricks so that you can deal with some difficult situations easily.
One of the most common ways to charge the battery is by using a car battery charger. Remember that we mentioned something about the type of battery, this is where it comes into use. Depending on the type of battery you can use the car battery charger.
There is a fast charger that will charge your battery quickly and there are some trickle charges which will take a long time to charge the battery. If you do end up using a car battery charger make sure to check the instruction manual.
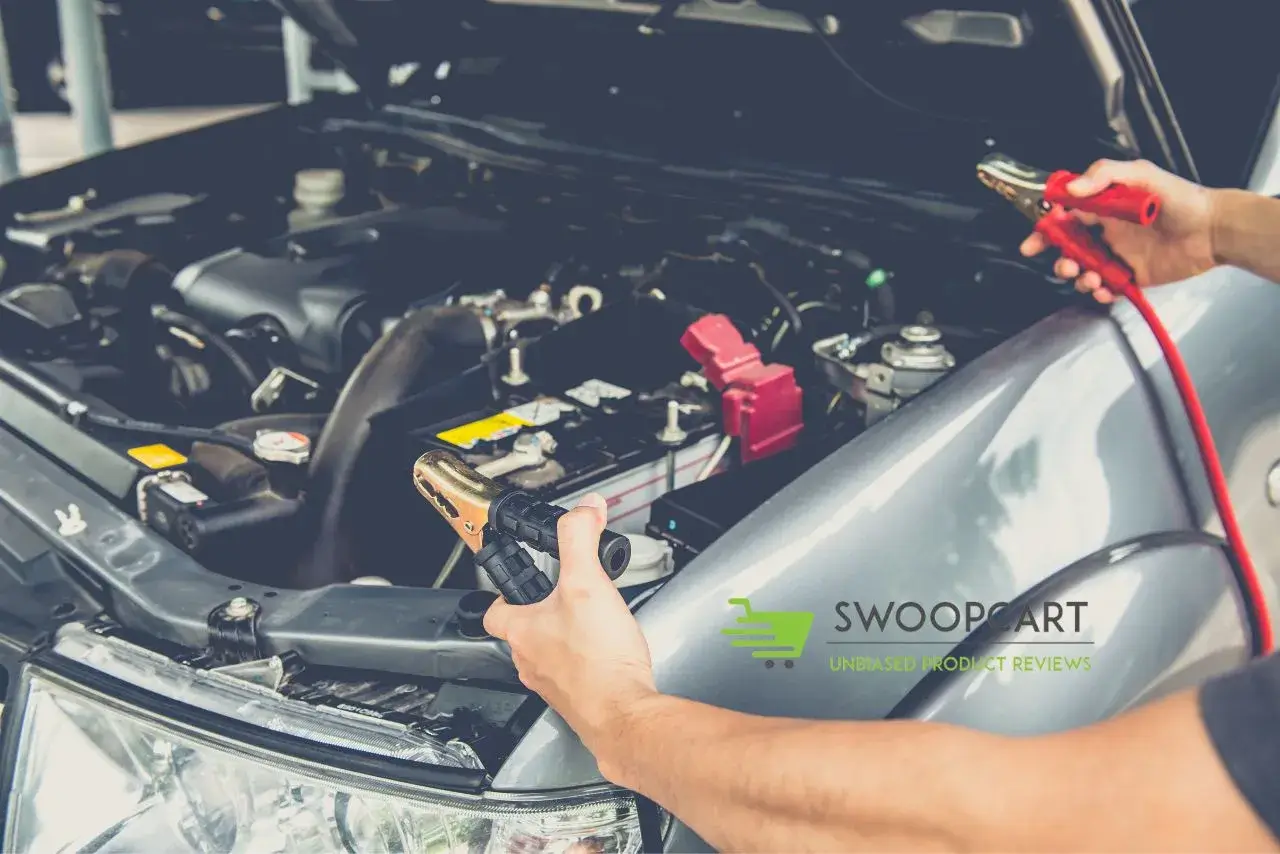
The other way to charge your car battery is to jump-start the battery. This is usually done with the help of other cars and jump-start cables. Thus carrying these cables can help you if you are stuck in the middle of the road.
Lastly, you can go to the service station and can charge the battery but it will cost you some bucks. Thus, the only best option is to charge the car battery with the help of a home inverter as it provides a quick reliable solution.
Video of How to Charge Car Battery With Home Inverter
Read Also: How to Buy Cheap Appliances Like a Pro
Verdict – How to Charge Car Battery at Home with Inverter
Charging the car battery with home inverters is great as they have a high power supply. They can easily charge your battery within some hours and you are all set to go. If you lack time, then this is an easy method to quickly charge your battery.
Follow the mentioned steps and you will not need any mechanic to get the job done. Just pay extra attention to the connections and there will be no worries. Having said that, make sure to drive the car regularly and switch off the lights as well as the radio when not in use. In the event, you cannot drive the car regularly, just drive the car once a week to maintain the voltage levels.
This way you will never find your car’s battery dying at the wrong time. Simply follow the steps that we’ve mentioned if you don’t wish to spend some extra cash.
Sources:-